Picture frames have been around not for decades, but for centuries. Generations of photography enthusiasts have used them to preserve and exhibit photographs that capture great moments of their lives. The moments which we treasure and want to blend into our home’s decor. Photographs preserve memories and the beautiful times spent with family and friends.
There are various ways to display your photos and keep up with new trends in design and interior decor. You can take a nostalgia trip with vintage-inspired photo frames or, by contrast, create a bold modern arrangement using unusual images with unorthodox compositions and vibrant colours. The choice is yours, and we’re here to help you make the most of each and every framed photo, no matter what your preferred style is.
To create an amazing wall art display using framed photos, follow these 7 steps.
1. Start Collecting Your Frames
Begin collecting your frames – and remember that the most impressive wall art collections have often started with a single frame! Consider the size of your potential frame collection and the layout of the prints. Do you want them all to be the same size? Or maybe you like to work with different print sizes? Find wall art display ideas on the internet – there are tons of amazing décor tips in interior design-focused blogs and online magazines, in trendy cafés and restaurants, and don’t forget to browse social media for a dose of inspiration.
2. Choose a Location
Once you have your best photos printed and framed, you’ll be tempted to hang them on the wall right away – but if you resist the temptation, take your time, and think carefully on when and how to hang photos, it’ll be well worth the effort!
To begin, consider the following factors:
- Is this a large enough room to create a feature wall with many photographs on it? The best walls for making a photo wall are ones that have enough free space that lets you appreciate the prints without being distracted.
- Is the backdrop basic and not patterned (so that when your photo wall is done, it doesn’t appear clumsy)?
- In which room is it located? Will the photo display be suitable for the space? (Motivational art can work well in home offices; children’s art and family pictures look the best in living spaces etc.)
3. Pick a Style
- What’s your home décor scheme? It’s essential to design a photo wall that blends in the general style of your home and complements the existing décor elements. Of course, a photo wall can stand out and look original – but it shouldn’t leave the impression that it was designed separately from the rest of the interior.
- The next task is making a well-thought-out gallery wall with various size frames in comparable colour tones (you may add new photographs as you grow your collection!).
4. Gather All the Necessary Materials
- Creating a photo wall is much easier if you have prepared all the pictures/frames/artwork up front.
- Depending on the format and size of your photo prints, you’ll need hanging tools, a drill, nails, a level, sticking strips, putty, tape, and any other instruments to hang things on the wall.

5. Begin to Arrange the Prints on the Wall
- Experiment with various arrangements for every frame on the floor (since it is easy to move things on the floor), until you find an arrangement you’re completely happy with.
- You can also work with paper templates, cut the same size and shape as your photo frames. Fix them on the wall with tape and rearrange the templates until you come up with a perfect arrangement.
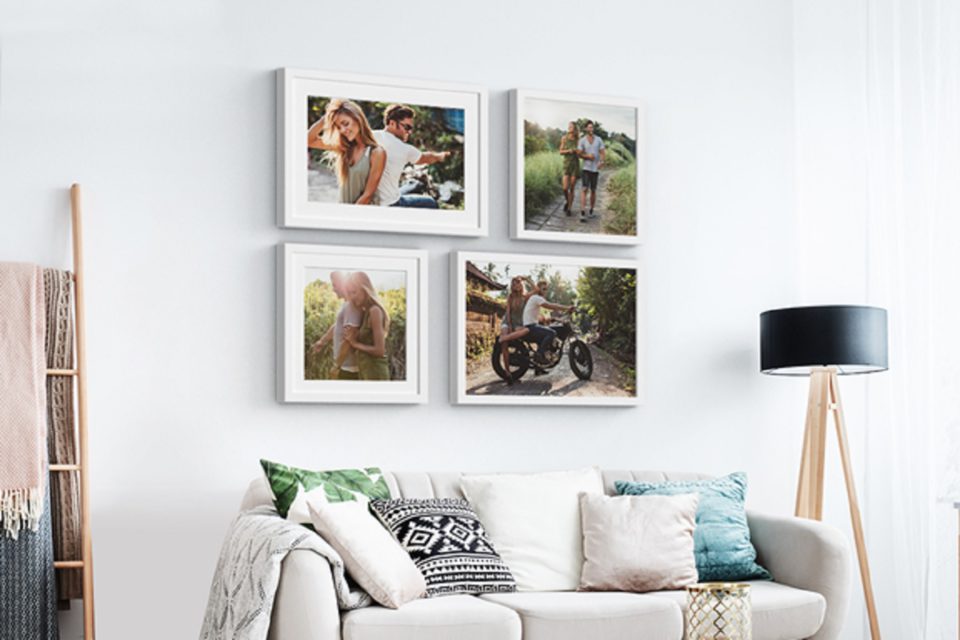
- If you’re using prints of different sizes, make sure they form a coherent whole on the wall. It’s a good idea to place larger prints in the centre of the arrangement and surround them with smaller prints that sprawl across the wall.
- Pay attention to the images themselves – if you do mix coloured prints with black & white images, make sure they’re evenly spaced over the wall and have some unifying elements. For example, all photos can be displayed in identical frames.
6. Fix the Prints on the Wall
There is more than one way to hang a picture on the wall. You can decide which option is best for you, depending on the size and format of your photo framed and also on you DIY skills and available tools.
- Hang the prints using drill and nails. That’s the DIY classic, and also the most reliable way to hang wall art. However, if you don’t feel confident around a drill, you might want to look for another solution.
- Use hanging strips, putty, or double-sided tape. All those nail-free hanging solutions work great for lighter print formats but aren’t a safe choice for heavy photo frames.
- Don’t hang anything, just lean the frames against the wall. While not an ideal solution for any interior, it’s a great décor idea that lets you easily create an unfussy artistic photo display without drilling a single hole in the wall.
7. Evaluate the Result
Take a step back, relax, and relish the beauty of your work. Remember that you can easily replace or update your gallery wall with new prints or expand the wall art arrangement whenever you wish. For example, you might want to change frames for the new season to incorporate an autumnal/winter motif. Simply choose what feature you wish to remove and replace it with a new framed photo of equal size.

9 Creative Ideas You Can Try
1. Use Photo Frames to Create a Gallery Wall.
Wall art is a terrific way to display your favourite images and prints on a bare wall. Make an original arrangement by combining a selection of pictures that represent something meaningful to you. The evergreen choice is an eclectic galley walls where framed photos are mixed and matched with other visually pleasing objects.
2. Display Pictures in a Vertical Panel
This is a beautiful and unorthodox way to show off photographs that are important to you. Choose identical square or rectangular frames with basic black edges and fill them with sequential photos that make a story. Then hang the frames vertically, creating symmetrical panels. This method works best for narrow spaces.
3. Create a Unique and Stylish Workspace
There’s nothing quite like a framed picture of someone you care about propped up at the desk to inspire you as you work. An elegantly framed picture on your desk is an ideal décor feature that will be uplifting without being distracting.
4. Mix & Match Different Frame Designs
Intersperse classic photo frames in oak, textured bamboo, bright fabric, and other materials to create a jumble of patterns and forms that work nicely together.
5. Create a Family Tree
This is a beautiful way to display family photos and give them a new life outside of photo albums. Your grandparents will naturally be at the bottom, and you may add photos of your ancestors through the generations to the branches & twigs. A stencil can be used to ink the leaves and stems on the wall. The beautiful aspect of this arrangement is that you can keep adding images to it as your family grows!
6. Display Nature’s Bits, Frozen in Time
All it takes is a gorgeous flower placed between the pages of the book or a leafy layout to transport you backward in history to a memory of such an outdoor camp, a childhood buddy, or a summer vacation. Put those happy memories within two layers of glass and frame and preserve them for years to come.
7. Add DIY Elements
If you wish, you can try decorating photo frames with some additional DIY décor features. Dried flowers, shells, paper clips and other similar objects can spruce up a classic photo frame and make your frame arrangement genuinely unique.
8. A Gallery Wall on the Staircase
When it comes to home design, the wall next to the staircase is typically overlooked, but you can use this space to tell some visual stories too! Mix it up with square, rectangular, and circular photo frames, and intersperse antique black and white photographs with modern colourful reproductions.
9. Add Some Fairy Lights
The shimmering fairy lights braided around the frames make a beautiful spectacle. You can have the lights on not only at night but also during the day.
DIY Tips to Keep in Mind
That’s a lot to take in, isn’t it? So to make things easier for you and help start your new home décor project, here is a wrap up of the most important aspects of an eye-catching photo wall:
- Pick photos and frames that go well with the overall design scheme of you home/room.
- Choose one bare wall with unpatterned background so that the images become a genuine centrepiece of the area.
- Make the photo wall appropriate for the space’s use (office, bedroom, family area, etc.)
- Choose between classic symmetrical arrangements or eclectic displays.
- Don’t limit yourself to photos in frames and think beyond the box. And don’t be afraid to rearrange your photo wall if you feel that the time has come for a change!